Sunday, October 29, 2023

Twelve  cards using 49 and Market Moonlit Garden


I wanted to use minimal supplies to make these cards plus being very impatient for the supplies to come into my local scrapbook store (Scrapmania), these 12 cards evolved.  I picked up a 6 X 8 paper pack, laser cut elements, tickets rolls, and Essential Filmstrips.  This collection seems very serene and calming so I decided to make this cards with encouragement and sympathy sentiments.  Using layers, foam tape, tickets, specialty sparkle and mirror papers these cards turned out to be one of my favorite sets. 

I separated my cards into several pictures to make it easier to see the details plus you can go to my FB post to see the cards up close with more detail.


Please let me know if you have any questions.

Blessing, Nancy

Thursday, October 19, 2023

Playing with 49 and Market

Do you ever have extra bits and pieces from your collections with 49 and Market after your initial project?  I love to make albums and when a new collection is released I always pick-up one of everything.  I want all the things to select from when creating which results in extra laser cuts, paper and ephemera.  I usually keep the most recent  3-5 collections in a separate box for each,  then I will start to combine pieces by color for the older collections. 

This card uses a frame and greenery, along with a neutral backgound paper. I like to always add a ticket to the cards as my signature for 49 and Market.


I made this card into a standard shaker using neutral sequins and fun bits.  I always have extra butterflies, so I attached one on the inside for that fun element.
Picking a few greenery laser cuts, a flower and a teal ticket finish off the design.

Thanks for stopping by today.


Blessing
Nancy


Tuesday, October 17, 2023

 Hello after a long absence.  During the pandemic I stopped posting here on my blog and now I've decided to start posting my fun crafty things.  Stay tuned for future postings.


Nancy 


Wednesday, June 10, 2020

"Giving Thanks" Blog Hop and Linky Party + Giveaway


Hello and I hope you are all well.  
It's time again for the  Altenew Educators to share projects with you and our subject is 'Giving Thanks".  I think this covers so many opportunities and examples of Thanks and Encouragement.

You should have arrived here from the blog of Nandini Karmarkar, if not please go back for her inspiration.  
Today I have several cards to share and I hope they will spark your creativity.


My first card features Altenew Playful Plumeria.  I stamped the flower and leaf images several times and then cut them out using the dies.  I stamped the branch directly on the card front and then created a fun arrangement.  I placed a few gems in the centers of the flowers to add bling and sparkle.   I love this set because it also includes many encouraging sentiments.  Simple design with unlimited possibilities.


This next example gets simpler yet.
Altenew Charming Doodles with a. sentiment selected from the Playful Plumeria that I used on my previous example.
I chose the small whispy flowers and stamped them a couple of times on the card front.  Keeping the clean and simple theme, I stamped a sentiment strip on vellum and attached it at the bottom over the stamped flowers.  I layered the white card front over a black layer for definition and then adhered a sparkly gem on each flower.


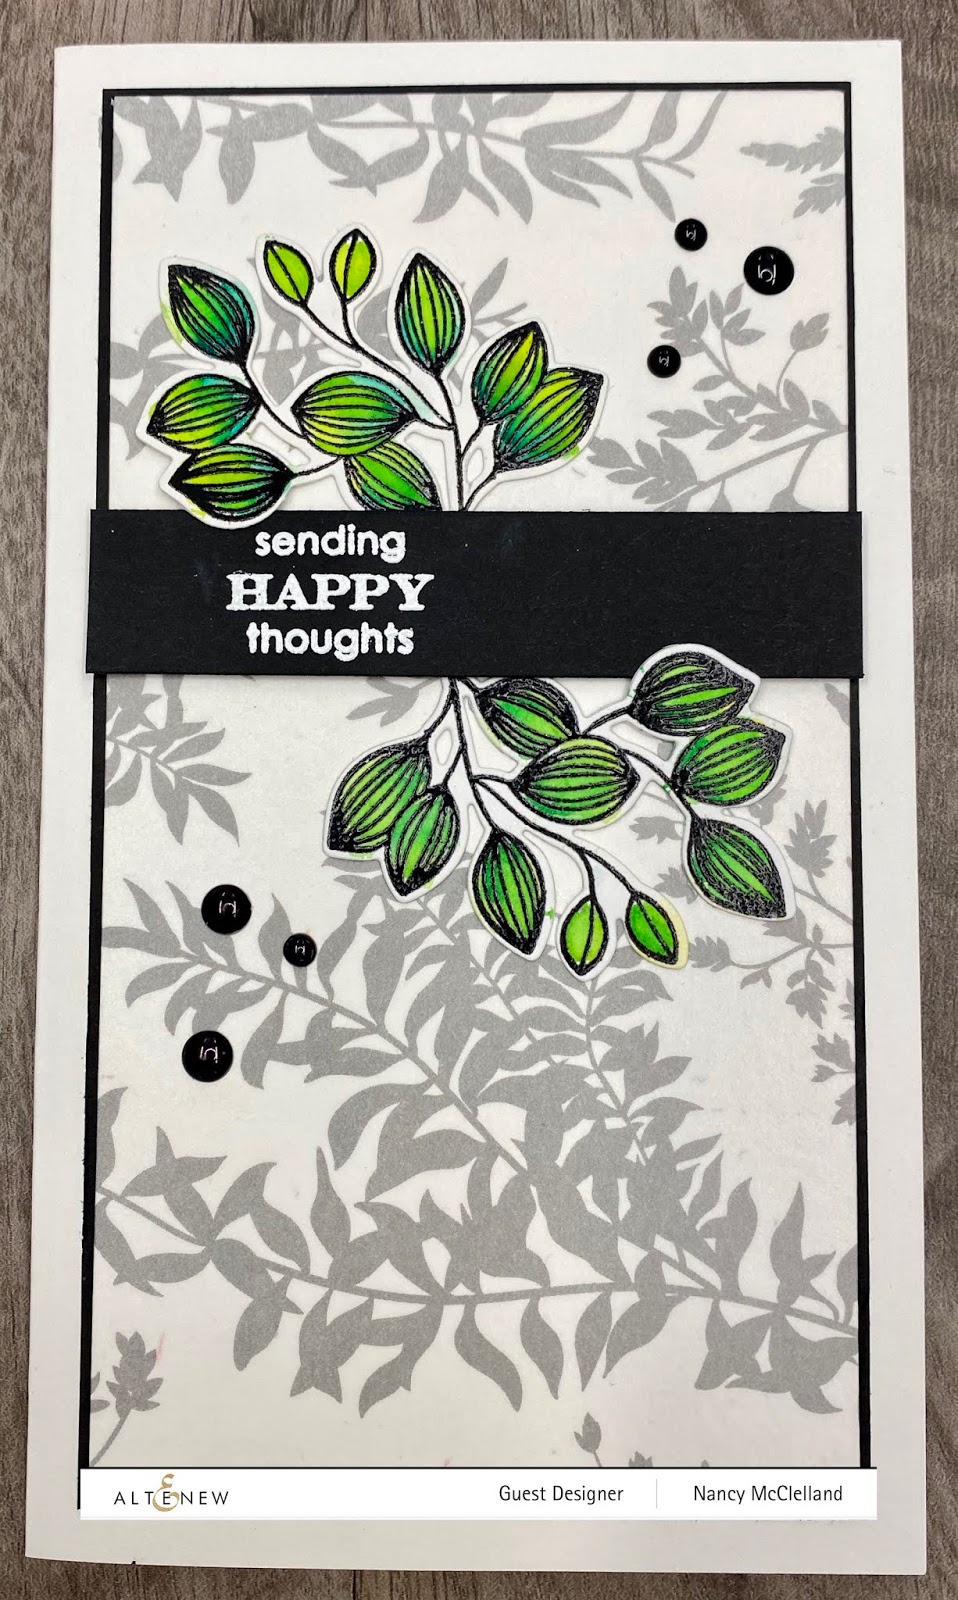
This next example is a variation of the new slimline cards that have been showing up everywhere.  
The card measures 4" X 7".
I cover a panel with Altenew Marshland Washi.  This washi is a great neutral background that allows you to add so many accents over it for a pop of color.
The leaves are from the Altenew Weekend Doodles set and I colored them with Altenew Watercolor Brush Markers.  The sentiment was heat embossed with white on a black strip and I used black Altenew Enamel Dots for accents.


My last card uses the Altenew Cheerful Meadow 6 X 6 paper pack.  This paper pack has so many gorgeous papers that make it simple and fast to create a card.  You could very easily cover a card front and then add a sentiment, but I decided to use the Altenew Fine Frames Diamonds Die Set to cut a diamond out of the decorative card front.  I selected the red dot paper to fill the hole/space that was created with the die cut.  After die cutting the diamond I had all the layers of diamonds remaining and I chose several to add on top of the red dot paper for accent and it also supplied more of the initial floral paper for interest.  I needed to incorporate my signature black into this card so I used a sentiment from the Altenew Best Sentiments set.  For final touches I used a black stacking card layer and black Enamel Dots.


Thanks for stopping by on the blog hop, your next stop on the hop is 
Neha Aggarwal I have included a full blog list below for reference.


Now for the fun stuff


Prizes:
Altenew is giving away a $30 gift certificate to 3 lucky winners!
Please leave a comment here on the
Altenew Card Blog by 6/17/2020 for a chance to win. 

We’ll also draw a winner to receive a $15 Altenew gift certificate from the comments left on each designer’s blog on the blog hop list below. All winners will be announced on the Card Blog on 6/21/2020.

There’s MORE! We will pick 2 of our favorite handmade creations from those who joined the linky party and they will each receive a $15 Altenew gift certificate!


Special offer:
FREE U.S. shipping with code HAPPY6T or $5 OFF international shipping with code SHOPPING6T at checkout on orders over $29. Offer valid from 6/10/2020 at 12:01 am EDT through6/11/2020 at 11:59 pm EDT. Shop HERE! Not valid on prior purchases. Cannot be combined with other promo codes. Not valid on Altenew Academy Classes and Virtual Workshops


Nancy McClelland - you are here


Sunday, March 29, 2020

Something To Brighten Your Day

I hope all is well and you're surviving this stay-at-home situation.  
I've been following along the internet with Facebook, You-tube, Instagram and blogs as I'm sure most of us have.
So many exceptional projects and fabulous designers offering hours upon hours of instruction and inspiration.  
Most of us have had many extra hours in our studios to play and discover all our supplies again.  I have taken this opportunity to focus a few days at a time on one medium and stamps that I feel deserve some love.
Today I want to share projects featuring Rina K and Gina K products.
Rina's new Electro-pop palette is so fun and bright. 


This first card is Screamin Green Neon Glitz over a green inked background.  I also stamped the leaves with Hello Yellow and Screamin Green Ink.  I finished the card up with black accents.


This next card uses the donuts that I made several weeks ago and I found in my stash.  
Once again I inked the background using Rina K Rockin Red and Poppin Pink Ink.
Using a stencil I put Poppin Pink Neon Glitz on the card front.  I finished the card off with the donuts and mounted on a cardfront with a black accent layer.


The card next in line is simple and elegant.  This card features items from the Gina K line.  As always I used my signature black on this card and needed to prep the black paper in order for the Turquoise Sea Glitz Glitter Gel to pop.  I started by using white pigment ink through the bubble stencil.  By doing this  first step my glitz gel will be more visible.
Stamping the large flower image from the Daisy Delight set and accenting a few areas with Copic markers.  I call this done.


This last card is my favorite.  Starting with the black panel, I wanted to try a decofoil color from my stash.  I've had the Opal foil for a long time but with its  translucency the color never showed up much on paper.  Well, with the new Blanco Transfer Gel, its the perfect solution to use before foiling.  I love the diagonal design from the stencil and how this step turned out.  Now it needs a focal image and sentiment.  Using Gina K Stamp & Foil Butterfly Kisses set and Rina K Electro-pop inks I stamped three images.  They looked a little flat so I stencils each butterfly with the matching Neon Glitz Gel.


I hope you enjoyed these cards and they brightened your day.

Take care and stay healthy.


Nancy


Tuesday, March 10, 2020

Altenew March 2020 Washi Tapes Release Blop Hop+Giveaway

It's time once again for another fabulous Washi Tape release.  Thanks for joining our blog hop, hopefully you started at the Altenew Card Blog, if not please go back and start at the beginning so you don't miss anything.  
You should have landed here from the blog of  Kymona Tracey and 'wow' how about that inspiration.

The entire new collection can be found here, so be sure to check everything out.

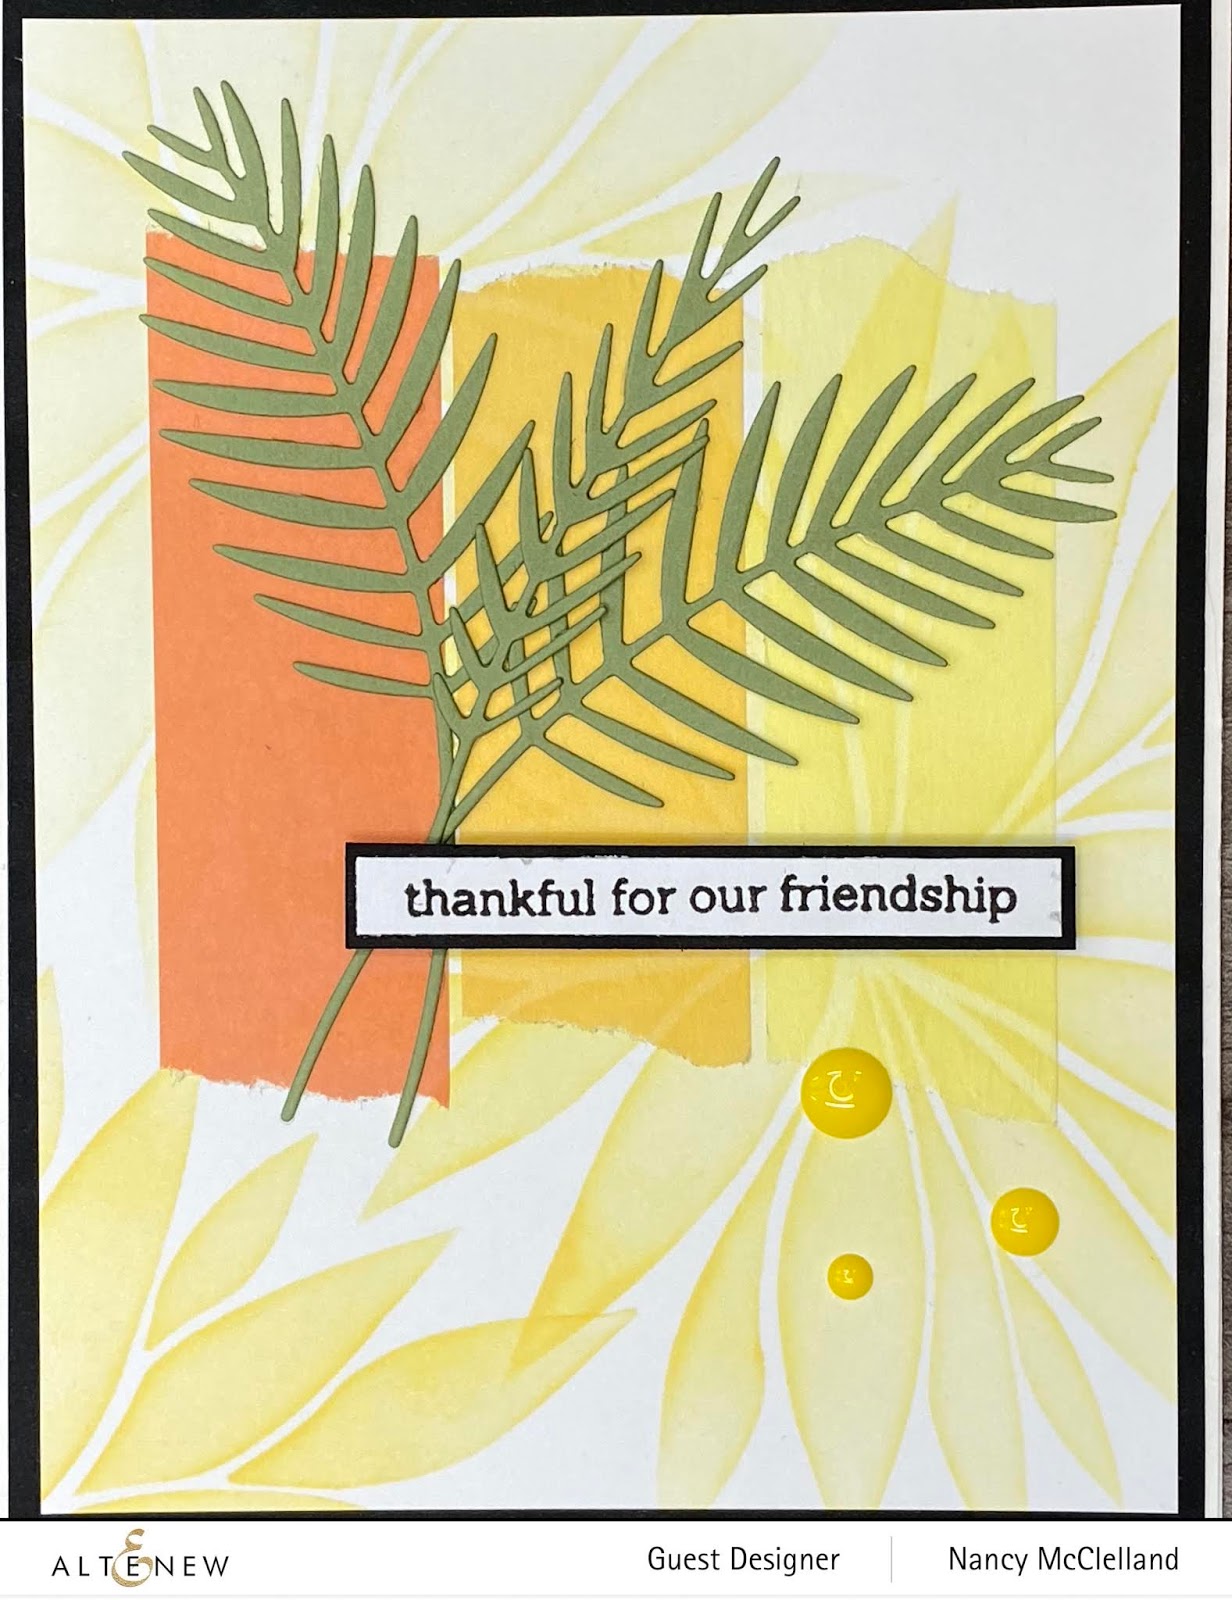
The first card I want to share is very simple.  I started by using the newly released Bursting Dahlia Stencil and inked a very simple background. I love the new Summer Afternoon Washi set with the coordinating colors.  I selected 3 washi tapes and placed them on the card front.  The Parlor Palm die set was used to add an accent along with the sentiment and enamel dots.

Summer Afternoon Washi Tape Set.jpg


For my next project I did a little fussy cutting after applying my 
Wild Floral Washi to a piece of cardstock.
Wild Flora Washi Tape.jpg


Once again I went back to our last release of stencils and pulled out my new favorite Wild Leopard stencil. Placing a very soft inked background on my panel I then arranged the floral images. This card actually has another new washi tape featured as an accent.  The Morning Glory Palette washi has been placed at the bottom along with the hello sentiment.


My next card features the Sweet Pea Palette Washi Tape
Sweet Pea Palette Washi Tape.jpg

It is fun and easy to create your own background using this thin washi tape.  I like the effect you achieve when you overlap the strips.  Using Forest Glades paper for my layered panel and accent on the sentiment helps pull the colors together.  Once again the featured sentiment is from the hello and hugs set.  Enamel dots finish off this card.


My last projects features Marbled Dream Washi
Marbled Dream Washi Tape.jpg
I covered a panel with the washi tape and then selected the Mega Thanks die for a dynamic, focal sentiment.
I couldn't resist using my signature black on this card by using the Pegboard Canvas Cover die over by Birchwood card front.  I also gold embossed a floral image from the Sweet Peas  stamp and die set which is placed on the upper left of the card.


For the fun stuff

Prizes:
To celebrate this release, Altenew is giving away a $30 gift certificate to 6 lucky winners! Please leave a comment on the Altenew Card Blog and/or Altenew Scrapbook Blog by 3/18/2020 for a chance to win.

We’ll also draw a winner to receive a $15 gift certificate from the comments left on each designer’s blog on the blog hop list below. All winners will be announced on the Altenew blogs on 3/21/2020. 

The complete blog hop list is below, and your next stop is

Thanks for stopping by and enjoy the blog hop.

Nancy


Friday, March 6, 2020

Butterflies from Neat & Tangled

I saw this butterfly stamp recently and knew it would be so much fun to color.  
It's a recent Neat & Tangled release,
'Butterfly Beauties'


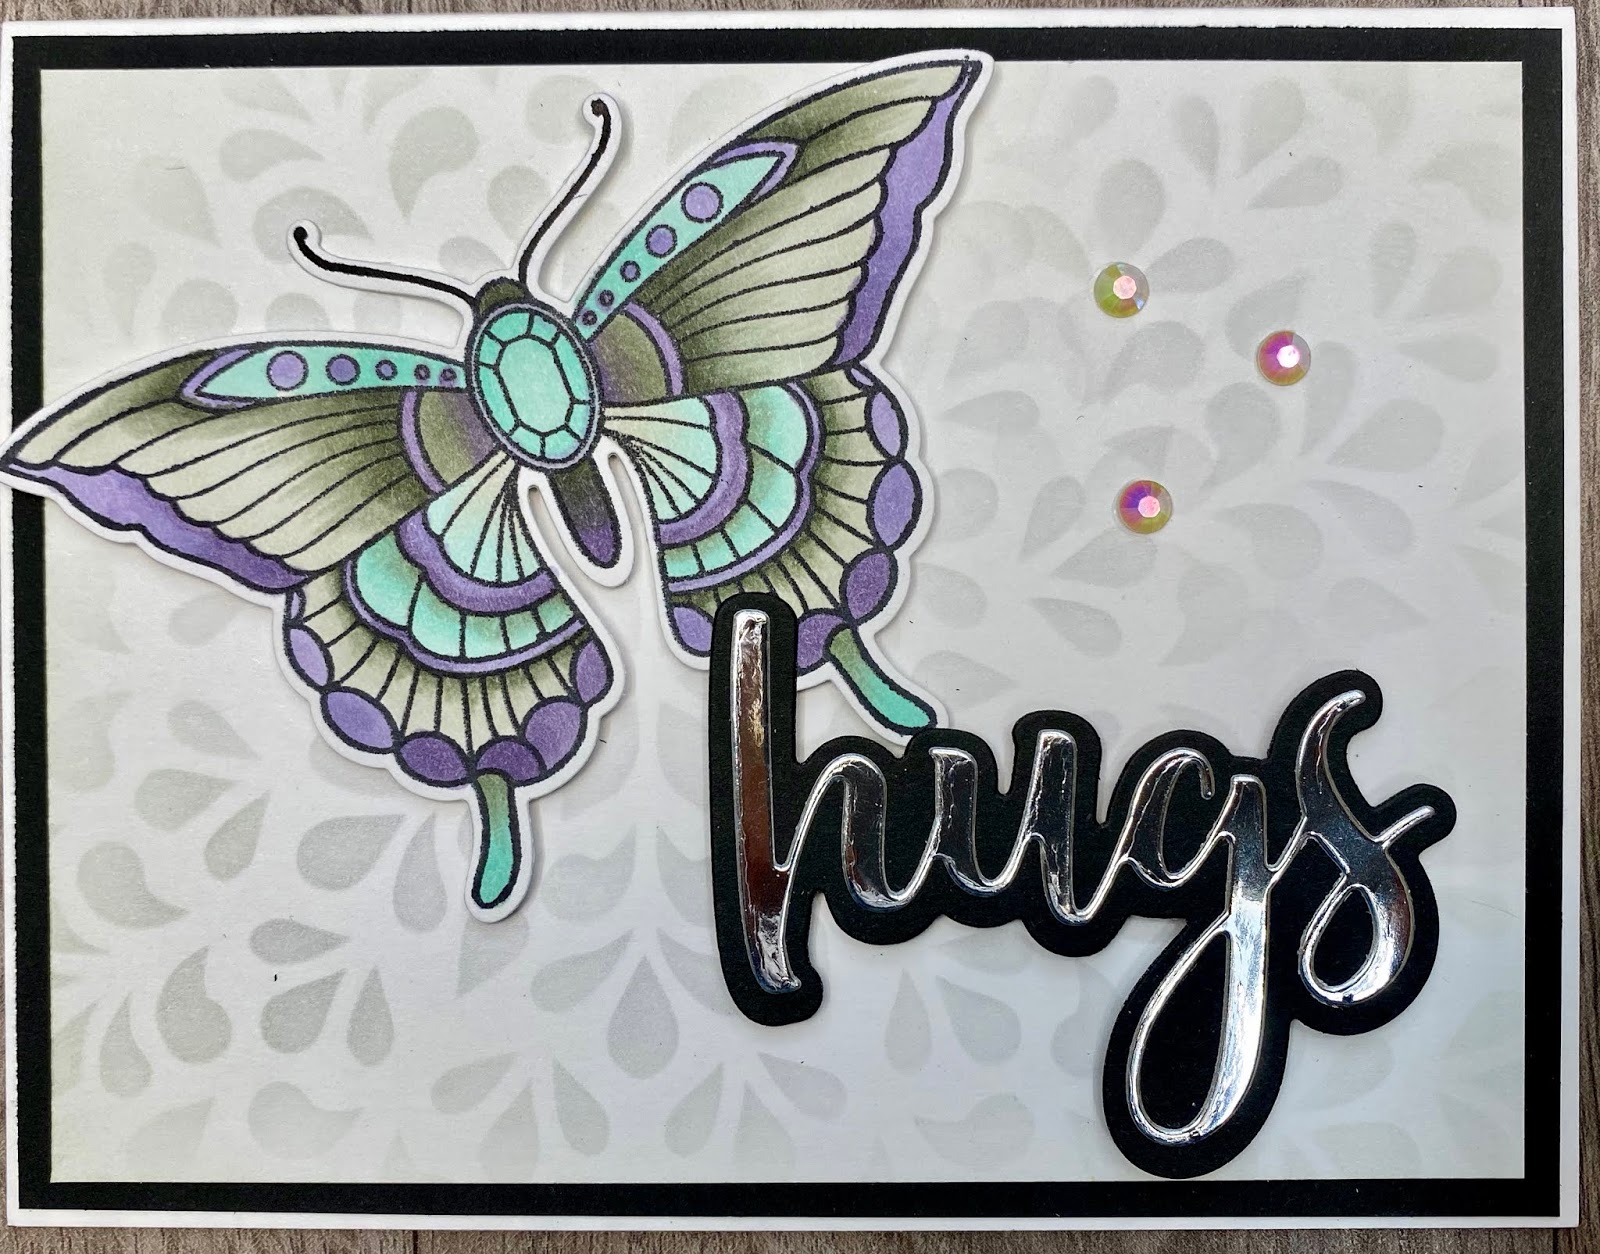
The first card I used Copic markers BV00, BV11, V25, BG90, BG93, BG96, G000, G00.
I stenciled a background panel using Gina K's Mandala Burst Stencil and Whisper Amalgam Ink.
My sentiment is a layered 'hugs' die from HoneyBee.
I finished off with some Lucy's Gems


My second card was also colored using Copic markers E51, E21, YR65, E97, E99, Y32, Y35, YR68.
The stencil I selected for this card is SO89 Stegmiller from StencilGirl.  I used several colors of Distress Ink to create the pattern.  
Once again I finished off with Lucy's Gems.

Thanks for stopping by today


Nancy