Showing posts with label Deco Foil. Show all posts

Monday, August 13, 2018

I’ve Been Taking a Break

Hello Everyone!
Well, I’ve had a busy summer as I’m sure most of you have.  I took a break since I have been traveling and also working in my garden.  This summer I've  taken classes from Gina and Rina K, traveled to Junkiefest 2018 and Stampaway 2018 then started my canning. 
Pickles, Salsa and Pesto are my three main items that keeps me busy.
My husband has started helping me with the process which has been very nice.  The prep work takes the longest and its always great to have those extra hands to lift the heavy canners.


Just the beginning 

Today I'm back in my craftroom and I want to share a couple of cards I made for special occasions. The first one was for our pastors daughter who got married a few weeks ago.  While attending Junkiefest I had the opportunity to play with the new Brutus Monroe Foilmates and luscious Tide Pool Deco Foil from Thermoweb.

This card was so very hard to photograph.


Here’s a closer look at the foil.  I used Tide Pool foil on the marble foilmates paper.


The next card I made for my sister's birthday.
I used the same foilmates and Tide Pool foil then added a copper accent strip along with highlighting the purple and teal colors that pop out of the foil.  
I also added the Fresh Picked Flowers diecut from Memory Box, along with some Lucy's Gems for accent.


Thanks for stopping by today and check back later this week for the August Altenew release.  
I'm excited to be a part of the blog hop this month.


Nancy 


Sunday, February 18, 2018

AECP - Level 2 - Beyond Basic Backgrounds

Beginning this next section of my Altenew certification I needed to come up with a WOW background.  After completing all my online classes I decided that I wanted to design a card using Foil and Embossing Paste

Sneak Peek

I chose the Splatter Stencil
I tape the stencil to my background paper and put deco foil Transfer Gel over the holes.  I let this dry until turns clear. 


Now I can run the paper with foil through my laminator.


This is deco foil - Lapis Watercolor 
It is so pretty, but is difficult to photograph

Now there's a couple of elements needed to complete the front of the card.

I stamped the flower using blue inks and then I used my Zig glue pen to add accents of foil in the center.


Sentiment is from

 I don't have the die for this set so I used my Scan-n-Cut to complete that job.


My Finished Card.

Love, Love it!


Thanks for stopping today

Blessings,

Nancy

Sunday, February 11, 2018

Let It Shine

Continuing with my classes and assignments for my Altenew Educator Certification, today I will be sharing my card for the Shine project.

Now you can add shine in many ways,
Glitter
Heat Embossing
Foil

I decided to combine several of these for my project.


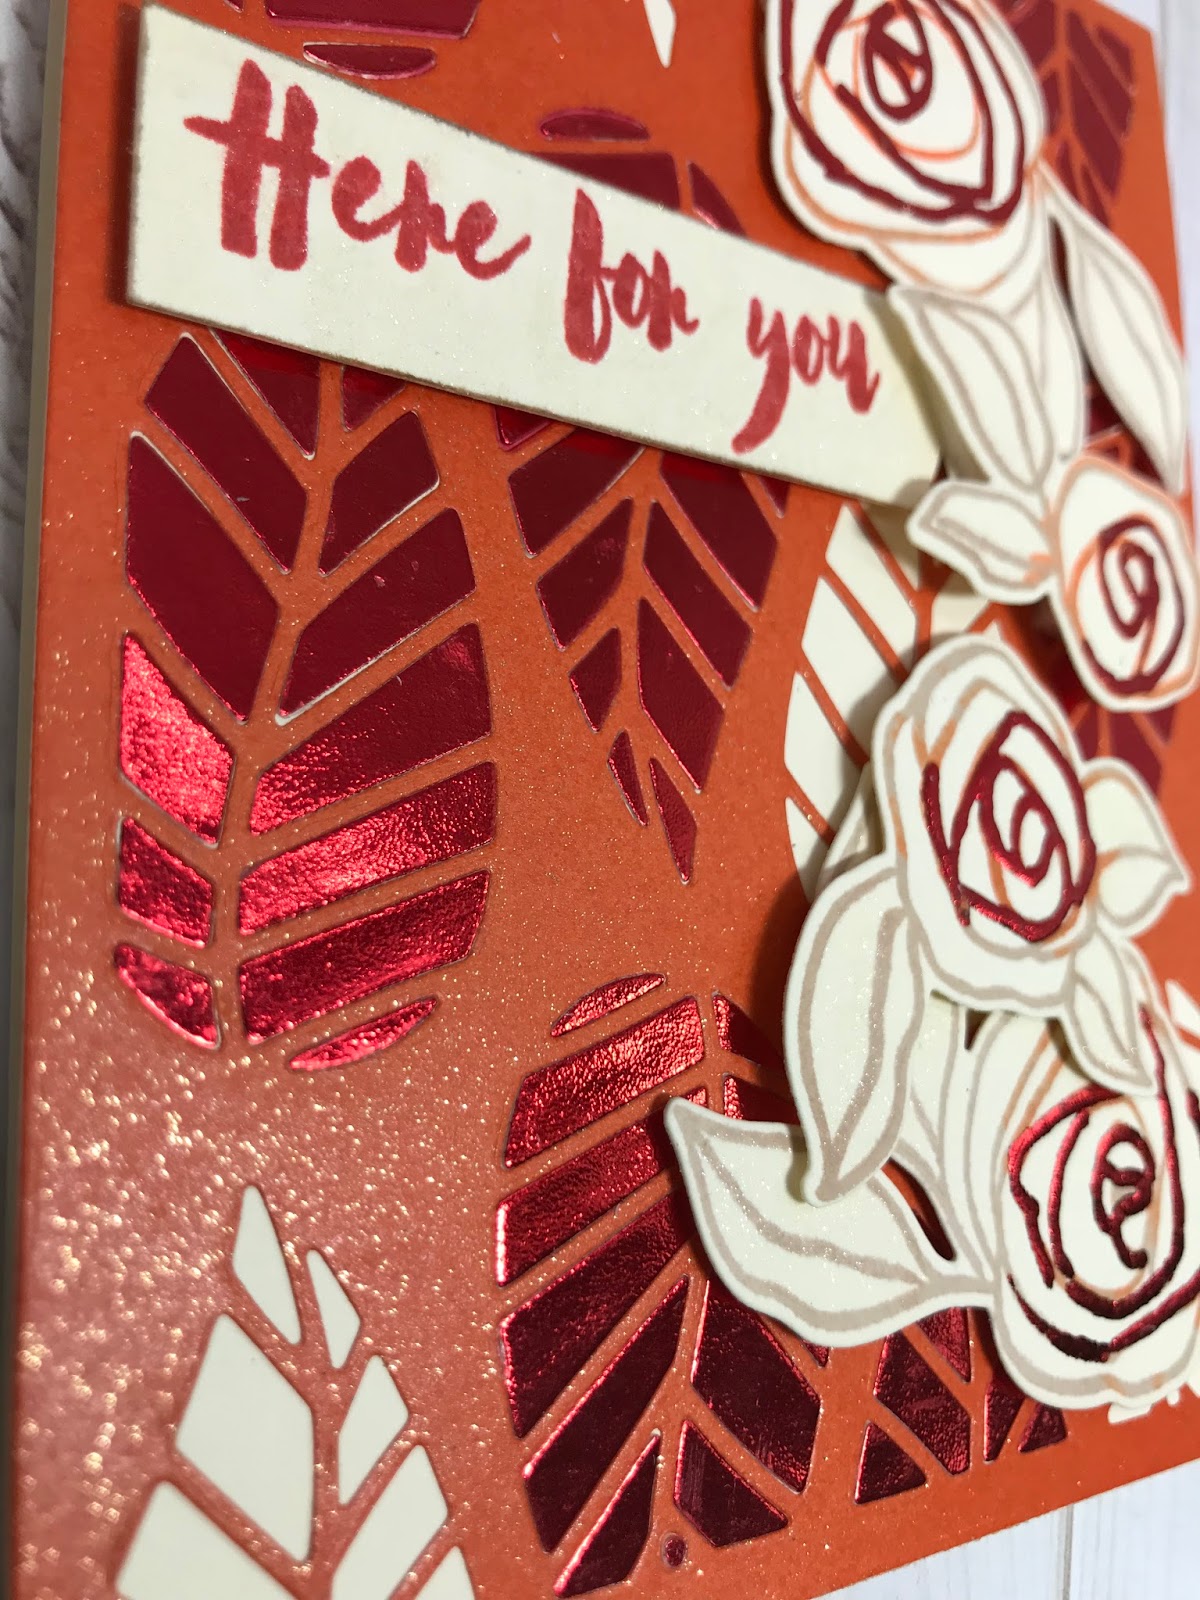
Cover dies are some of my favorites to create with.  They provide many options and 'Wow' factors on your card fronts.   I have used this cover die many times, but decided to do a inlay technique.  Would it have been easier to just layer this over a foil panel, well YES, but then what fun is that. 

First I die cut red foil paper 

Using Press'n seal plastic I secured my die cut pieces.


oops, several pieces came off, no problem

I have another piece of paper that I have die cut out of orange paper and adhered to my card base.  I decided to use a Glitter Dust spray on the orange panel just to add a little sparkle.


Now the fun begins.  I will take the red foil pieces and selectively glue them into the card front panel, just like a puzzle.  This can be somewhat tedious but I love the end result and reward.


When I finished this process I ran the card through my die cut machine just to flatten the pieces and give the card a inlay look for the red foil.

Needing to add something more to the card, I decided to put some flowers on the right side.  It was important to select a flower that coordinates well with the cover die so I selected the Altenew Bamboo Rose set.  This floral image does a great job matching up the floral leaves with the cover die leaves. 


Using Rocky Shores and Autumn Blaze Ink, the images are ready to be die cut.  Needing to combine these flowers with the card I decided to also add some foil accents in the centers.  


I started by using my zig glue pen and covering some of the lines with glue which will prep it for the foil accents.  If you notice in the picture the glue is blue when wet, as it dries it will turn clear.  You want the glue to be 'tacky' to touch with no actual wet glue before you press the foil on the paper.
I used a scrap of red foil and just pressed it on the tacky glue and burnished with my finger.  Remove the foil and you have fun accents.


You can see the Glitter Dust spray, the inlayed foil leaves and the foil accent on flowers


Adding a sentiment from the Bamboo Rose set, my card is finished.
I really enjoyed making this card and will definitely practice this inlay technique more.

Have a Blessed Day!

Nancy


Altenew Stamp & Die Set - Bamboo Rose
Altenew Ink - Autumn Blaze and Rocky Shores
Red DecoFoil
thermoweb Glitter Dust


Tuesday, May 24, 2016

Copic and Foil Flowers

So I needed to do a little desk cleaning today before I head out for my Copic Class at Scrapmania.  Many of you know that one of my favorite things to do is make cards out of all the scrap laying around.  I have been playing around with Deco Foil and how it reacts with Copics.  
I found that they do play well together and I will be experimenting more very soon.
The image is from my digital stash and printed on a laser printer.  
I used a  laminator to adhere the foil


This is the front of the card using some simple circles and gems to add the finishing touches


I tried to take a close-up so you could see the shine on the foil.

Thanks for stopping by today.

Nancy